website logo
⌘K
Hand Held Legend Wiki
Modding Tips
Restore Your Original Gameboy Bumper Buttons To Factory
IPS Comparison Info
Headphones Working But Speaker Is Not
Power Switch Cleaning Guide
IPS LCD Dry Test
GBA SP | IPS LCD Dry Test
Soldering Iron Guide
HHL Products
GC Pocket Adapter
Open Controller DevKit
Retro-C Cable Information
RetroGlow
ProGCC Mod Kit
T6 Torx Screws
Console Guides
Game Gear
Electrolytic Re-Cap Guide
Nintendo Switch
GameCube
Game Boy (DMG)
Game Boy Pocket
Game Boy Color
Game Boy Advance (AGB)
Game Boy Advance SP
Mod Install Guides
Nintendo Switch
Game Gear
GameCube
Game Boy (DMG)
Game Boy Pocket/Light
Game Boy Color
Game Boy Advance (AGB)
Game Boy Advance SP
Atari Lynx
WonderSwan
Product Usage Guides
Writing A Rom To A Flash Cart
🧃 CleanJuice Modules
Game Boy Color
Troubleshooting
🔉Audio
IPS Troubleshooting Guide
⚡EZ-Flash Omega Troubleshoot
🔋 Power Switch Is Too Small
Developer Center
Nintendo Switch
Affiliate Guidelines
Docs powered by archbee 
2min

IPS Ready SP Shell Trim Guide

This guide shows you how to trim your IPS ready shell to fit the Game Boy Advance SP IPS Backlight LCD Kit V2 - HISPEEDIDO. If you are unsure if your IPS ready shell needs to be trimmed for your IPS kit, please reach out to support at support@handheldlegend.com

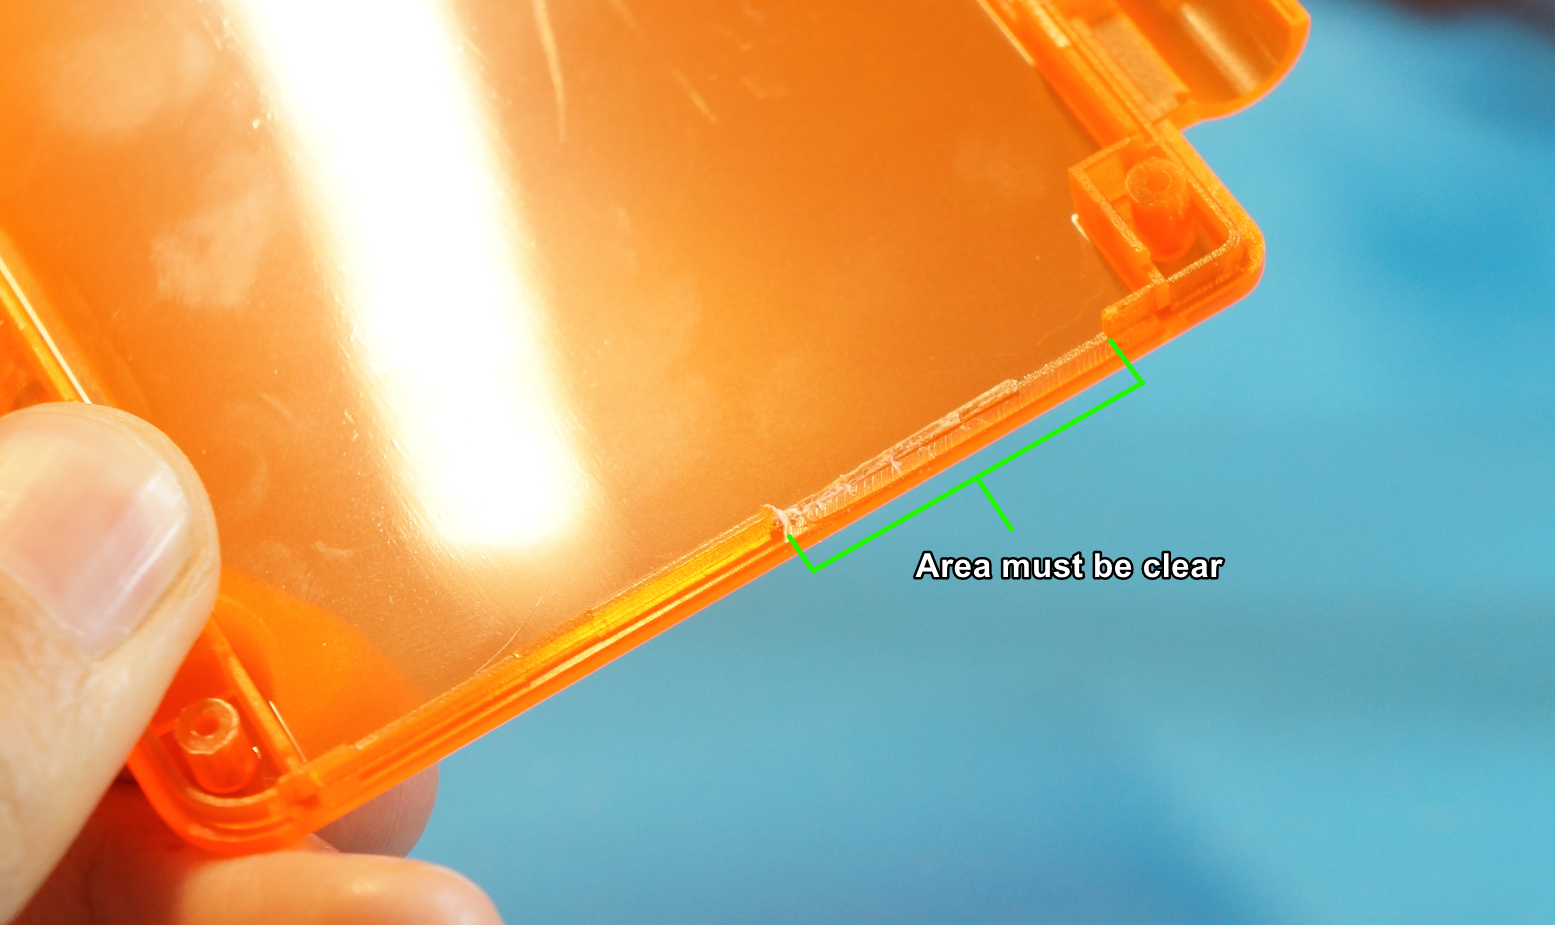
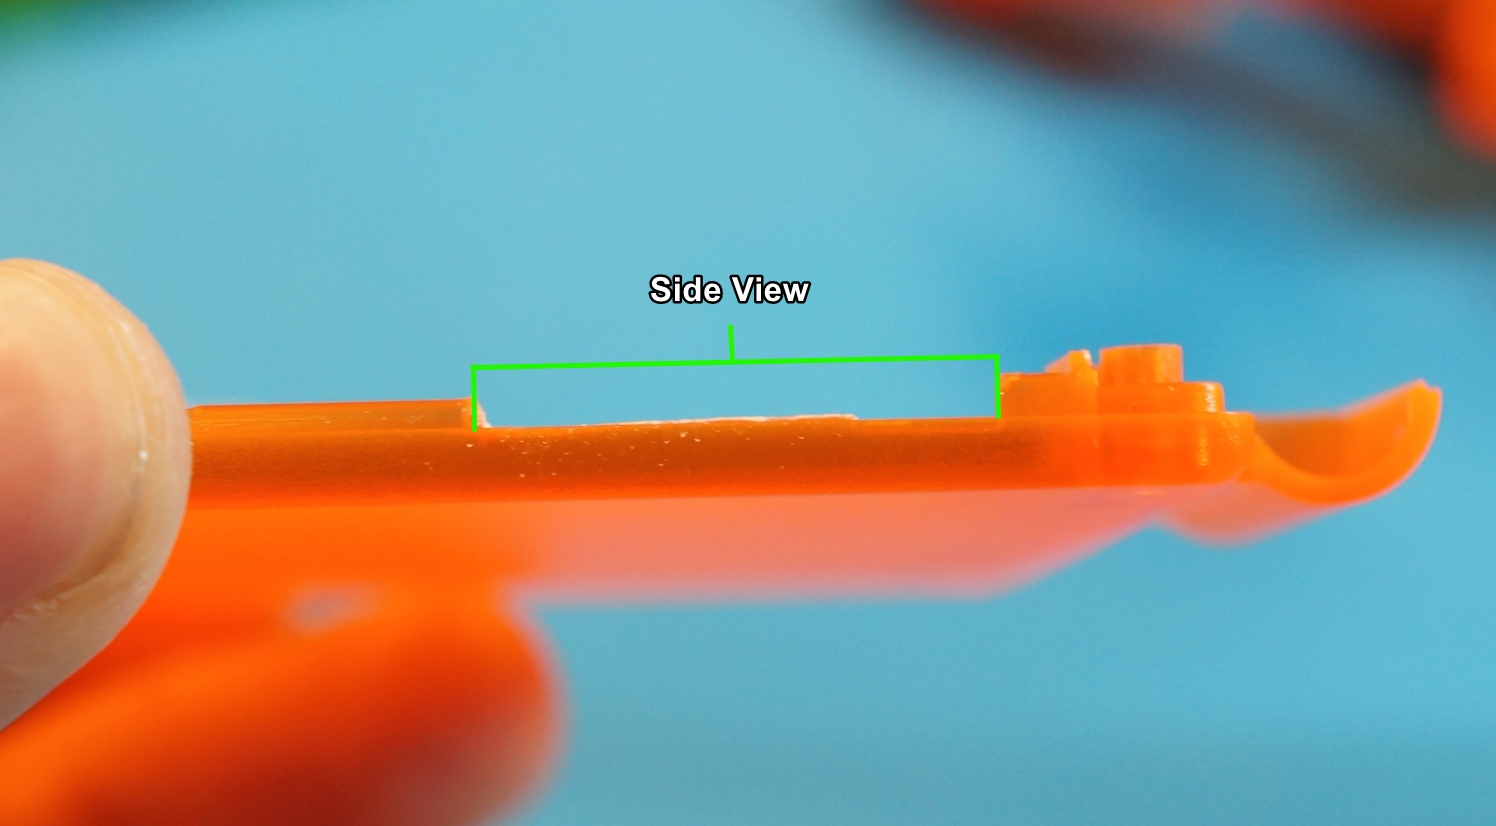
The trim is necessary in order to fit your LCD and PCB in the top shell housing. The IPS ready shells are pre-cut for IPS kits, however, they were designed for thin FPC cables, as opposed to thicker stiff PCB's. The black PCB included with the V2 and V3 kits will have an extra piece of material around the FPC cables that will not allow for the top shell housing to close completely. Look at the photos in this guide to trim your top shell which will ensure the LCD and PCB are sitting properly and safely in the shell.
Document image
Document image
Board installed
Board installed
Updated 17 Aug 2022
Did this page help you?
Yes
No
UP NEXT
OEM/Aftermarket SP Shell Trim Guide
Docs powered by archbee