GBAccelerator Install Guide
To install this mod, you will need a good set of soldering skills. You will likely need to use hot air to remove the clock chip from the console.
Required Parts:
- Soldering Iron
- Solder
- Flux
- Hot air
To begin the installation process of the GBAccelerator, we need to remove the clock chip from the console, this will allow the GBAccelerator to take control of the clock speed.

We recommend putting flux on the board and using hot air to remove the clock. Just be careful that nothing else falls off the board or gets damaged with the hot air. Constantly move your hot air around and avoid burning the board.
Once you have the clock off of the console then you can begin the installation of the GBAccelerator, we start by placing the module right below the ram on the front of the console.

From here all we need to do is solder the wires according to the image above. You will solder to the pad located directly next to the clock of the console, this will allow you the GBAccelerator to control the speed of the CPU. You also need to connect wires to the button pads, LED, and power points. Once you have all the wires soldered you can go ahread and reassemble your console!
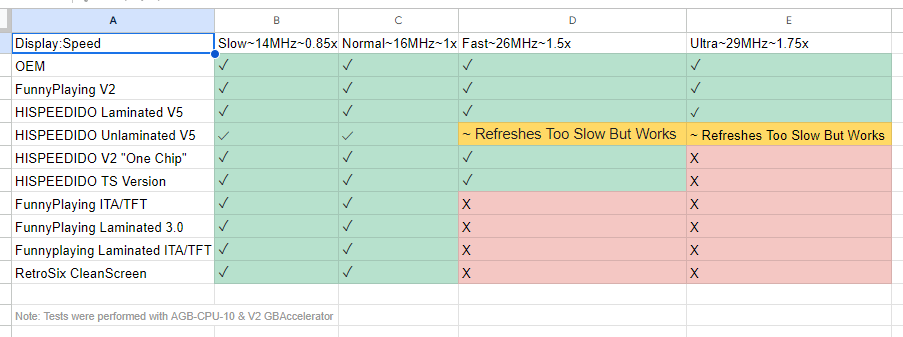
HandHeldLegend, as well as Division6, can not guarantee functionality with any aftermarket screens. Each one is designed differently and has a potential to not work at all, with that being said we have done some testing with some common screens.


