GBC FunnyPlaying Battery Mod Install Guide
This mod gives your console a 1800mAh battery that can be recharged using the original power port on the bottom of the console.
- You can NOT play and charge this system at the same time. You HAVE to power the system down before charging the battery.
- You must have the original regulator still in use on your console
- You will also have to remove a fuse from the system in order for this kit to function.
- If you have to clear out the battery compartment, make sure there are no sharp edges that can damage the battery.
Ensure you have all the parts included with your kit. See below:
The FunnyPlaying Battery Kit For GBC includes:
- 1 x 3.7V 2000mAh Lithium Ion Battery (~1800mAh upon testing)
- 1 x PCB charging module
- 1 x USB Charging Cable
- 2 x Wires
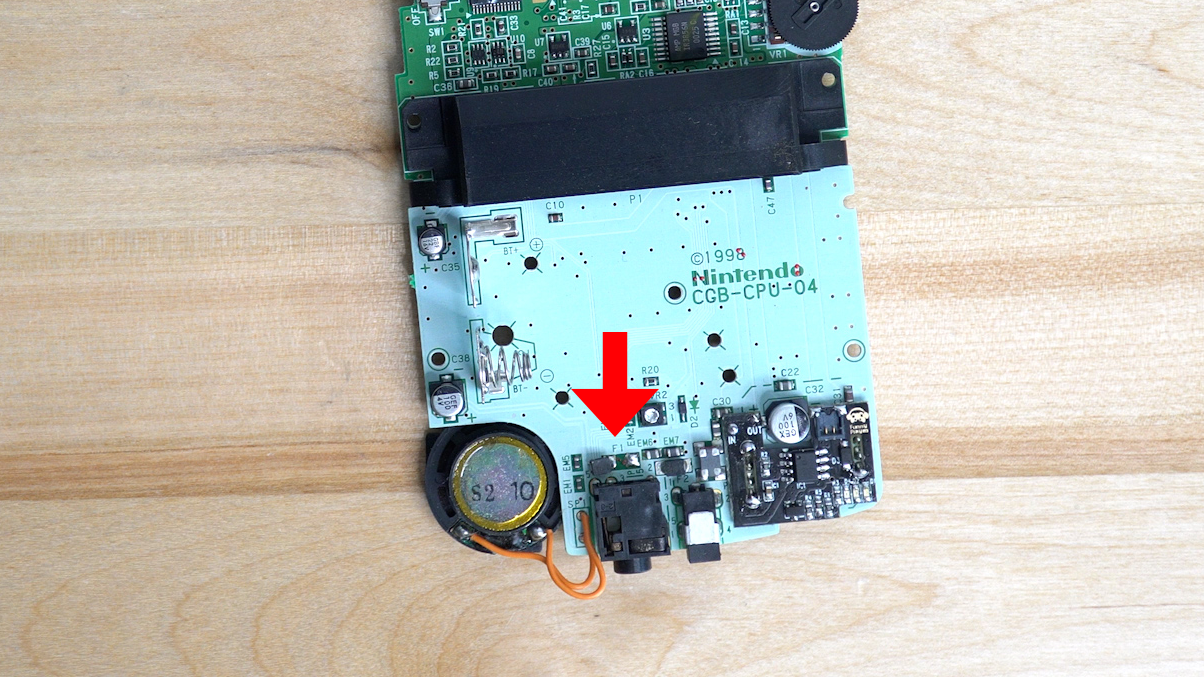
The first step is to solder the battery control module ontop of the regulator, it will be tacked down with three points that will connect to the pins on the regulator.

Once you've got the three points of the BCM (Battery Control Module) soldered, you will then need to remove fuse F1 from the board. To do this, we recommend keeping one leg of the fuse soldered so that if you ever choose to undo the mod, it can be placed back.

Next we will want to tin and solder the wires to the IN and OUT pads on the BCM, they will then be connected to the pads that we took the fuse from. IN will go to the right pad of the resistor, while OUT will go to the left.

Once that is done you are technically done with all of the electronics involved in this mod. Depending on which shell you used for your mod, you may have to trim the battery compartment so that the battery can fit. We used flush cutters to remove the bulk of the plastic and then followed up with a rotary tool to smooth out the plastic.


After you've cleared the room for the battery, you can run the wire through the hole in the battery compartment, it then gets plugged into the BCM. Simply place the batteries wire overtop of the connector and press down gently.

From this point, you can put your console back together as normal!

