GameCube Controller Disassembly
This is our guide for fully disassembling your GameCube controller.

- Y1 Tri-point screwdriver
- J0 screwdriver (Optional for trigger removal)
Flip your controller over. Unscrew the 6 Y1 screws.

Remove the back cover.
Note the position of the cable around the plastic post as well as the orientation of the rumble motor. These must be installed exactly as shown during reassembly.

Also, note the position of the trigger potentiometer sliders. They must be fully in the 'up' position for the controller reassembly.

Remove the rumble motor and set it aside. Carefully unclip the two wires from the rumble bracket. The rumble motor will remain attached to the PCB for this disassembly.

Remove the Z button and set it aside. You can now remove the main board from the front shell.

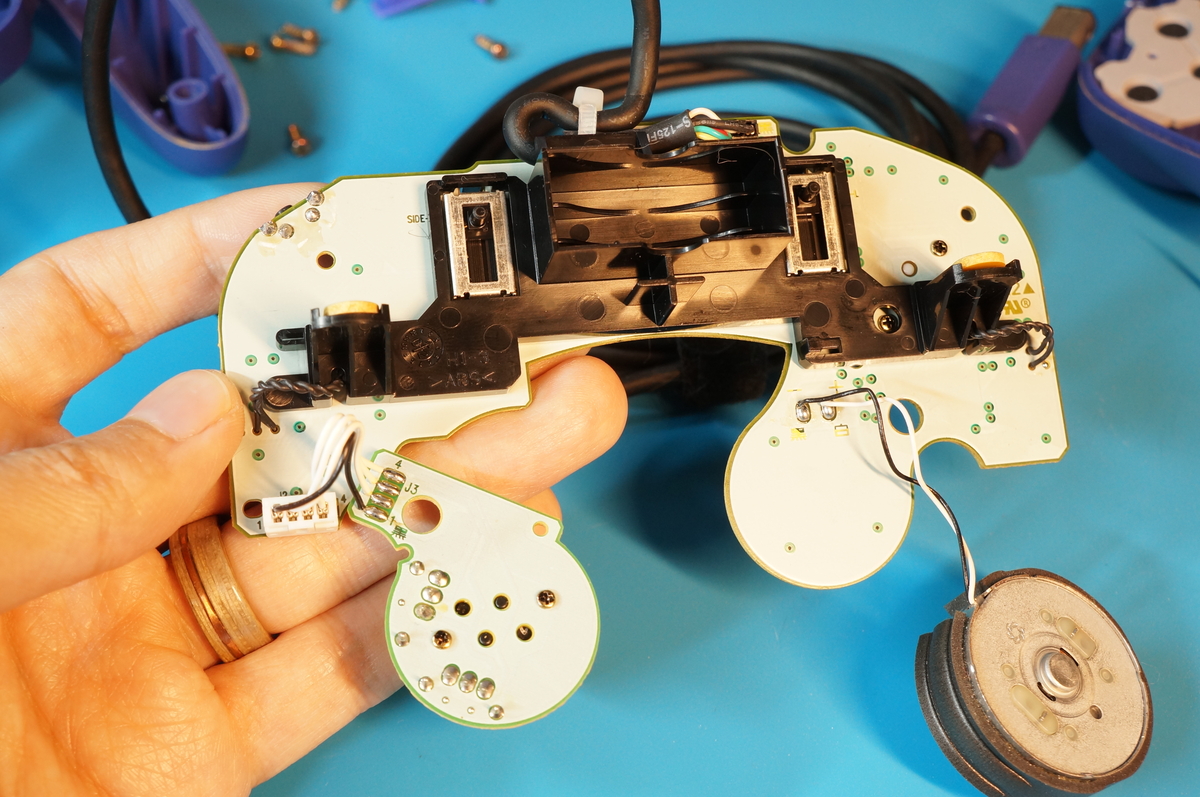
Flip the main board over. Note the two plastic clips which secure the rumble bracket. Press these clips in with your finger or a spudger tool to release the rumble bracket.
Note that the trigger connection pads are still connected to the rumble bracket at this stage. We'll remove those next.


Carefully route the trigger pad PCB wires under and away from the rumble bracket. The smaller PCBs should easily slide out as you lift up the rumble bracket.

The sticks can be pulled away from the stickboxes with a bit of force. The sticks only fit on in one orientation. Note the keyhole shape when reassembling.

Remove all buttons and membranes if you wish to clean them or replace them.

Remove the J0 screws holding the trigger brackets in place.
Note the orientation of these brackets and trigger spring assemblies as they are not interchangeable between the left and right side of the controller.
Remove the brackets and set them aside.
There is a metal hinge which must be unclipped from the trigger. Not all controllers have this clip. Now we can carefully tilt the trigger up and remove it along with the spring assembly.

The spring assembly can be disassembled further as shown.

You did it! Follow these steps in reverse to reassemble your GameCube controller.


