AGB Drop In IPS Hispeedido | Install Guide
ViThis is our install guide for the HISPEEDIDO Drop In IPS Kit Install Guide
This kit has optional soldering that will allow you to control the brightness through the buttons. This is NOT required and the screen will still work without this.
- Tweezers
- J1 (Japanese Industrial standard) Screwdriver
- Y1 Tri-point screwdriver
Ensure you have all the parts included with each kit. See below:
HISPEEDIDO Drop In IPS Kit Includes:
- IPS Panel
- IPS Control Panel
- 2 Flex Cables (One for each console variant)
- Screen Alignment Pieces
- Insulating Film
- Glue For Mounting
- Optional Button Control Wire x3
Installing your IPS kit, bending the ribbon cables, soldering, or applying any adhesives in this kit will void the warranty and return policy. Fully test your kit before proceeding.
Look at the main board to determine which of the included FPC cables you'll need to use. There are 32 pin and 40 pin options.


Connect the ribbon cable for the display to the controller board as shown below. Ensure the cable is fully inserted before closing the connector.

Once connected fold the screen over and apply some double sided tape to the back of the control board, fixing it to the IPS display.

Now connect the appropriate FPC cable for your console as shown below.

Next connect the other end of that flex cable to the console itself.

From here we can insert the console into the back half of the shell and dry test.

Insert batteries and test the screen.

Soldering Tips
For a general guide to soldering, check out our wiki posting on the subject.
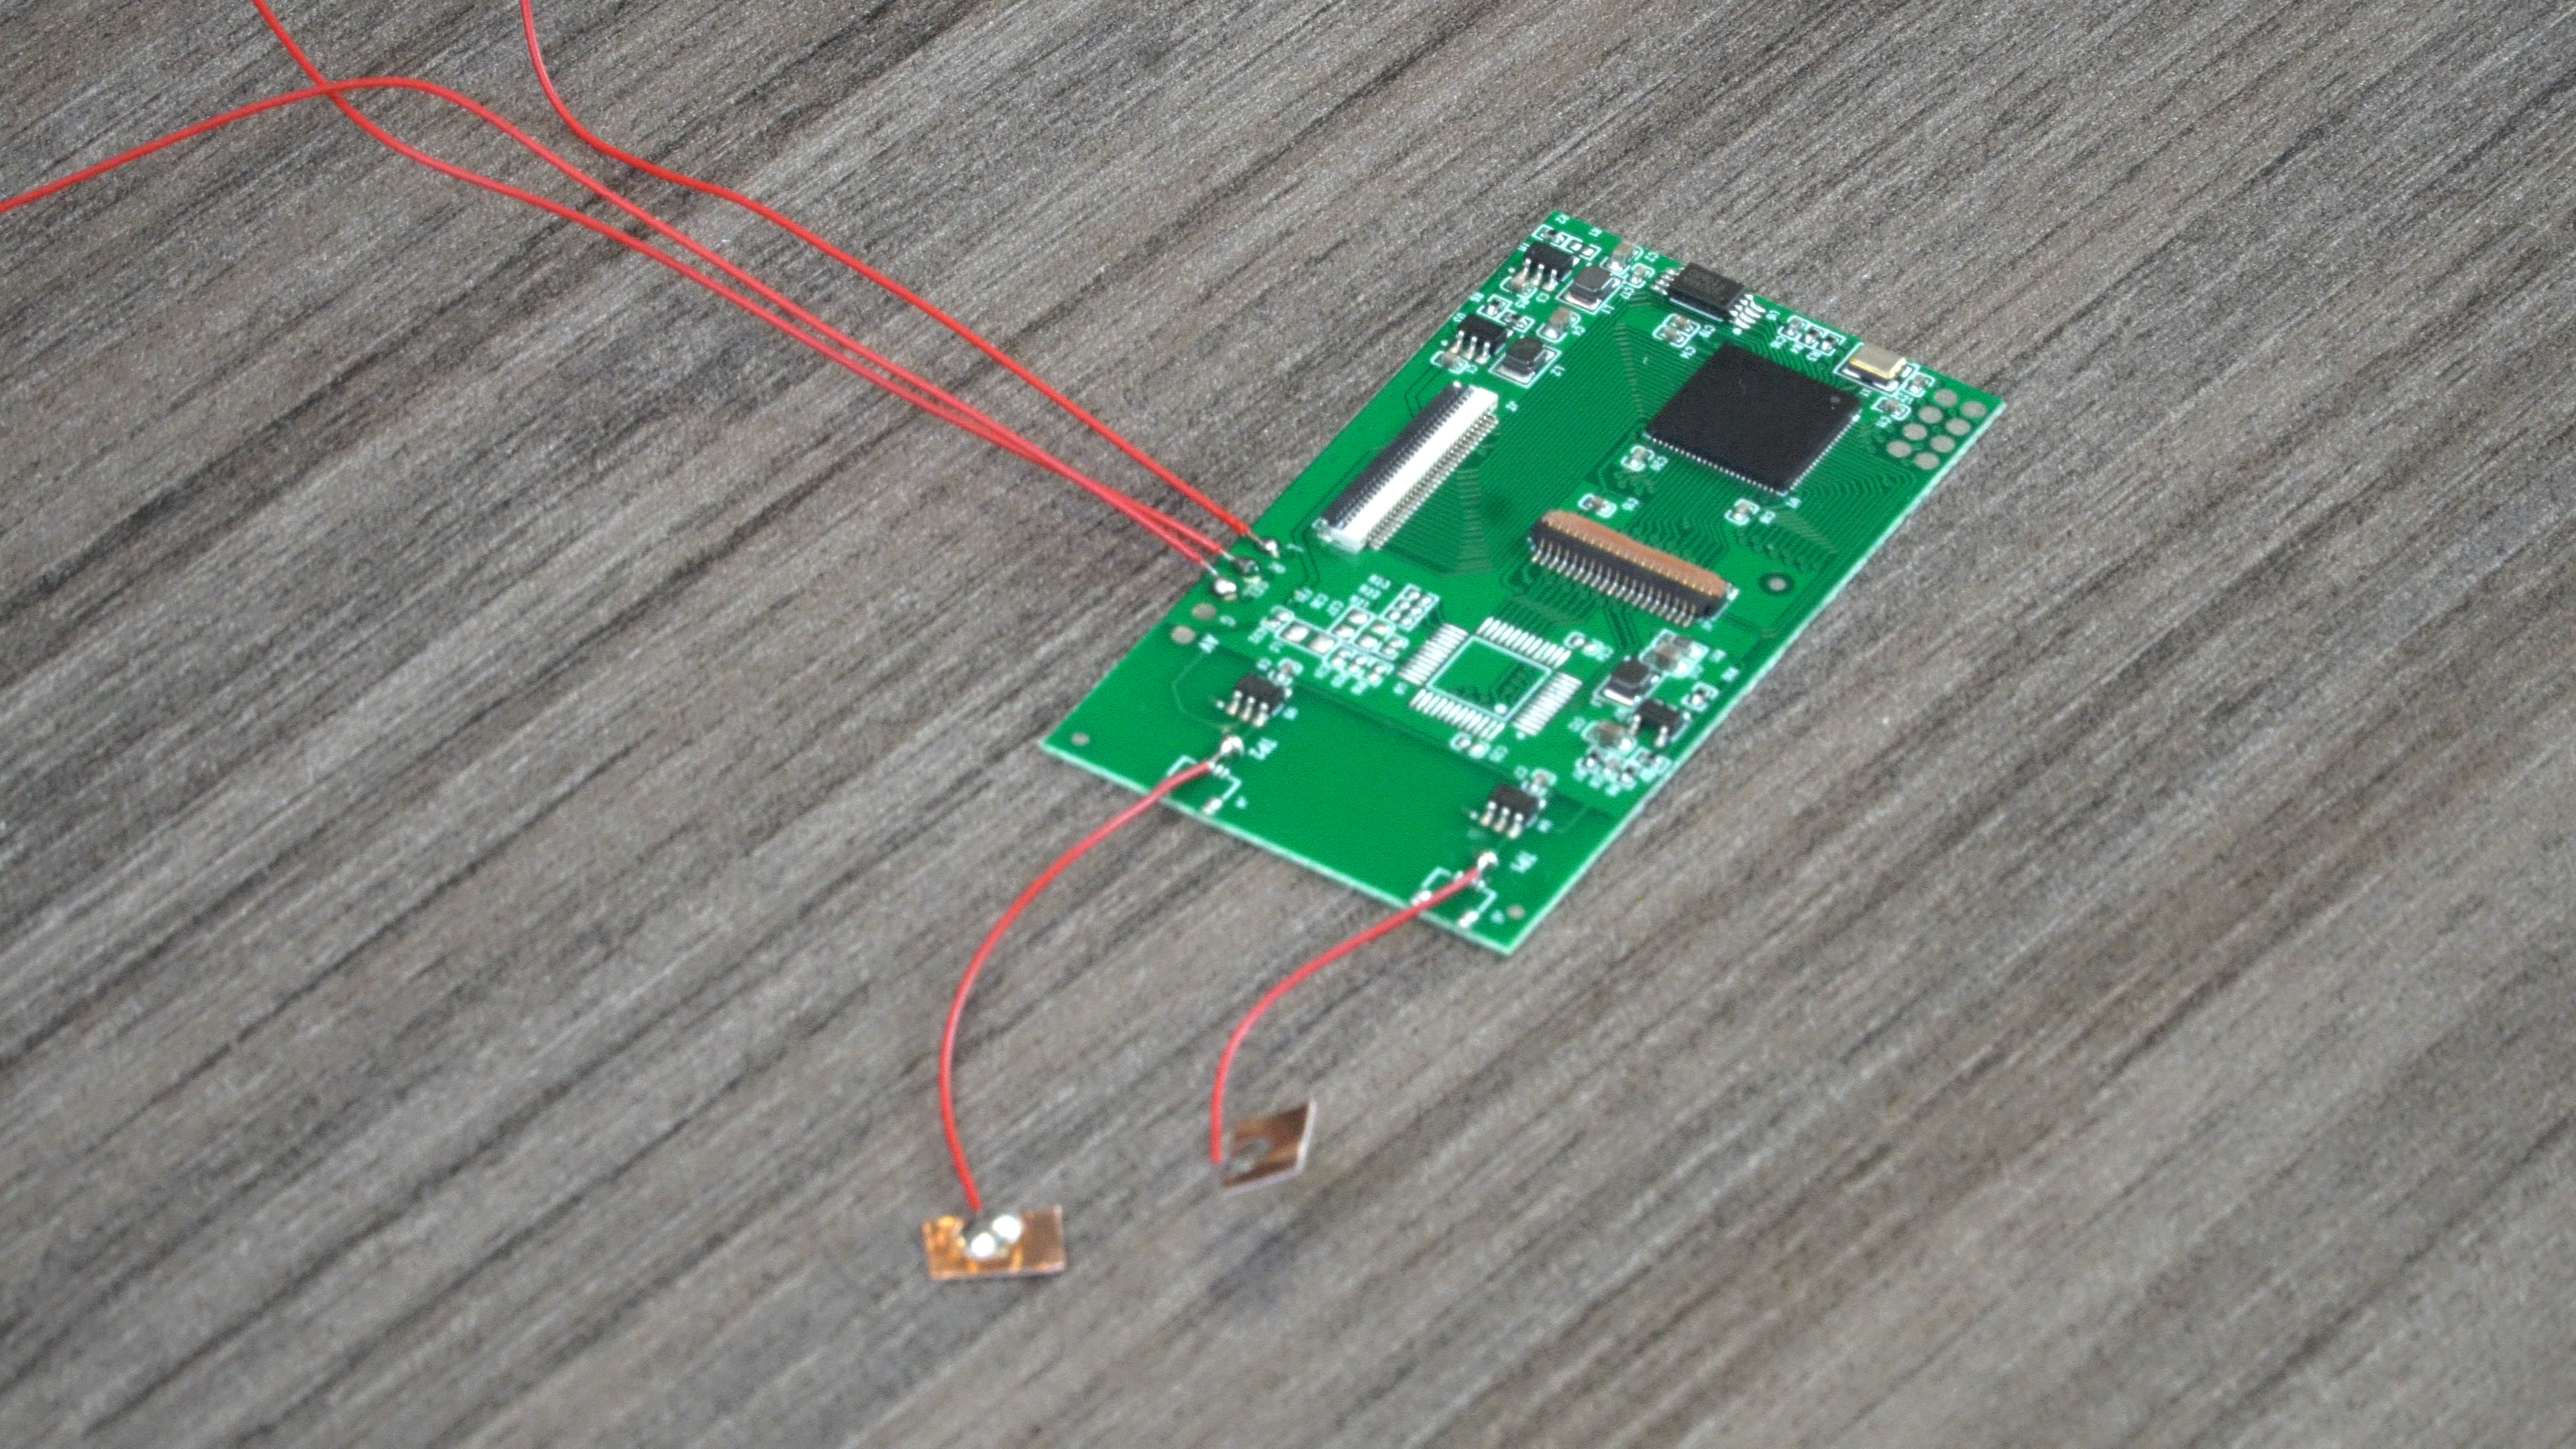
Soldering three wires allows you to control the brightness from the buttons as well.

Begin by soldering the wires to the control board of the IPS panel

Then proceed to solder the wires to their indicated point

From this point, perform one more test to ensure the buttons are working
Once you have ensure the screen as well as the optional buttons work, you can begin reassembling the console. First put the screen alignment pieces into place.

Ensure the screen sits in the bottom left hand corner of the area, pressing up against the pieces you just put in. Also place the piece of insulating tape across the IPS control board to keep it from shorting out on anything.

Optionally you can also use the provided adhesive to help hold the screen in place. You simply place the adhesive into the shell and place the screen on top after removing the protective film.

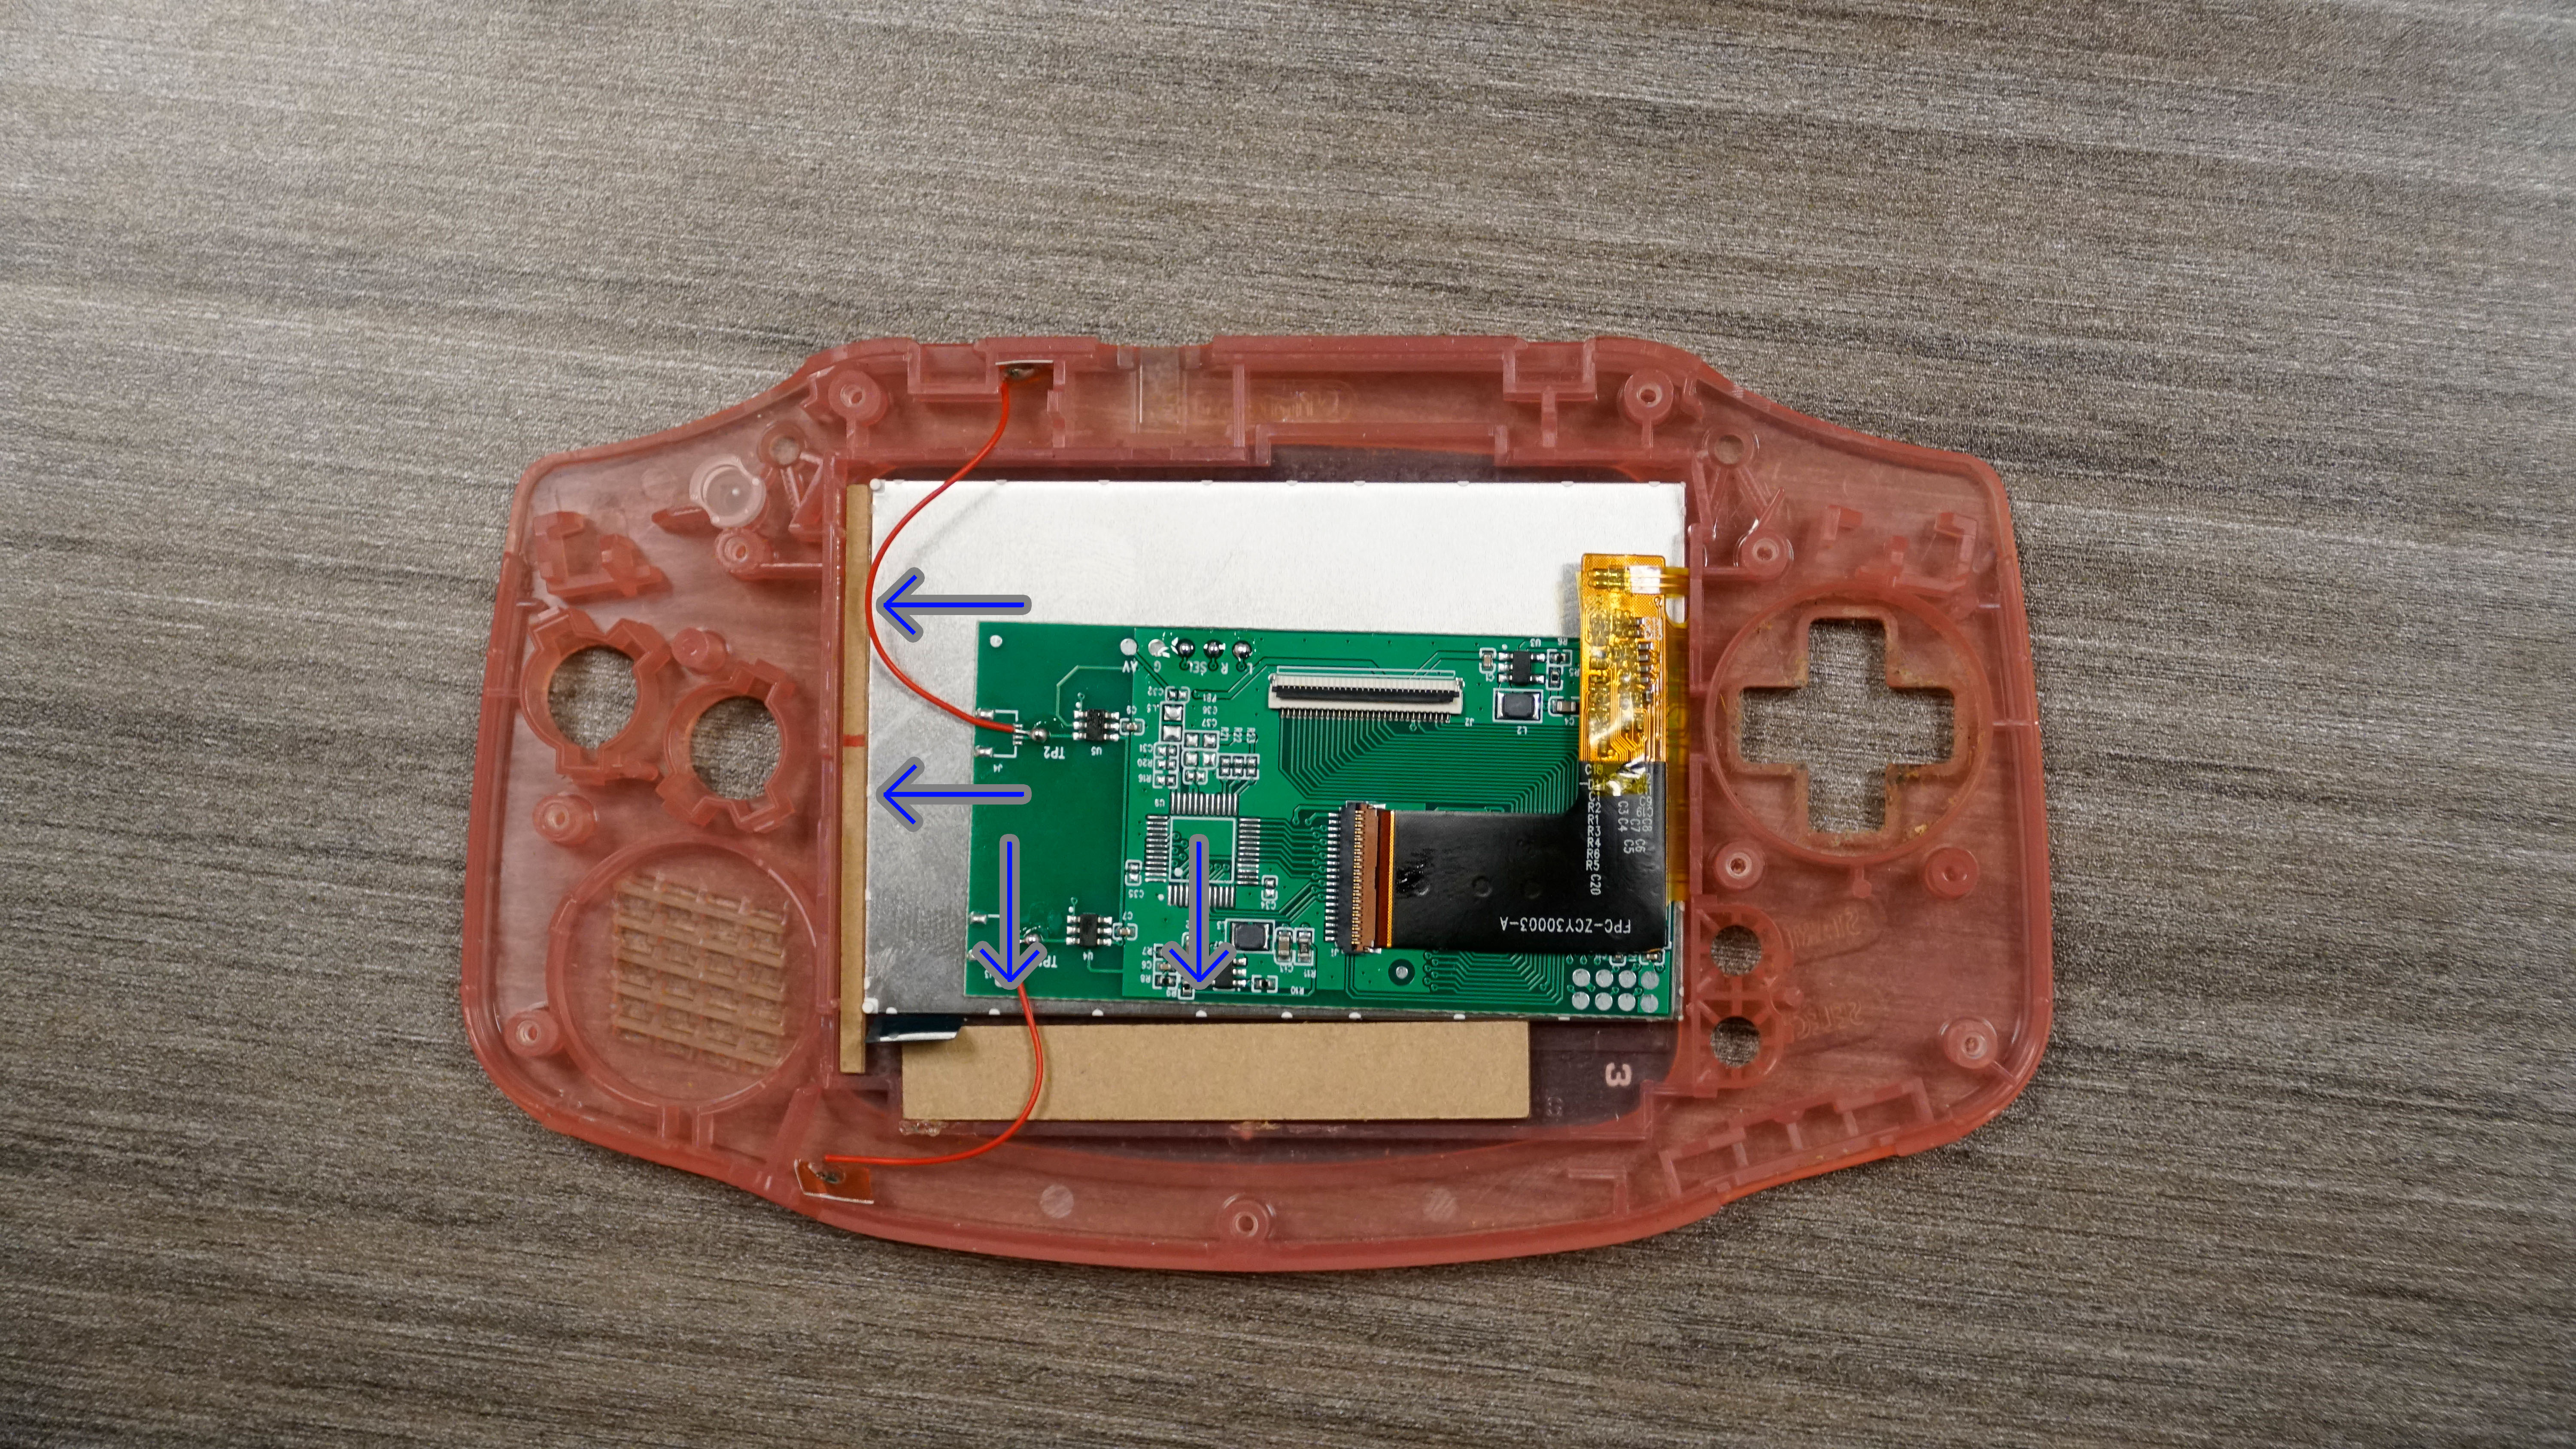
From here you can stick the touch sensors in these areas, you can move them around but these locations will prevent accidental changes, and the possibility of interference.

Now add the rear shell and screws, completing the console

If everything is functioning as expected, go ahead and complete the reassembly by replacing the rear screws. See our disassembly guide if you need further assistance here.
- If you have any questions or concerns, please reach out to [email protected]

